Resizing Images
Converting images can be achieved at three different times:
- During Import
- While it is in the Project Browser
- When it has been placed on the Timeline
To resize during Import:
- Select Edit > Control Panel ( Figure 3.22 ).

Figure 3.22 Selecting the Control Panel.
- Click Image Import ( Figure 3.23 ). This brings up the Image Import Properties box ( Figure 3.24 ).
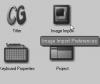
Figure 3.23 The Image Import icon on the Control Panel.
Most of the settings here are for various specialized image-related problems and configurations. Details on this can be found in Chapter 6 of the Avid Liquid Reference Manual. The two areas of greater interest are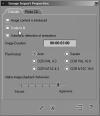
Figure 3.24 The Image Import Properties window.
- Scale to fit: When selected, this will import images to the current TV standard.
- Image Duration: This defaults to 3 seconds, but most editors prefer a minimum duration of at least 10 seconds. You can set this here and dynamically resize it on the Timeline at a later point.
- Click the Scale to fit check box.
- Close the Image Properties box and import your image. Figure 3.25 shows the original image imported with this setting. Don't worry too much about the black border running around the outside of the screen; remember, not all of the Inlay will be shown on most TV screens. Trial and error is required here to see what works for you and what doesn't.
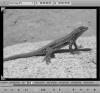
Figure 3.25 The original image reimported using the new settings.
)
)
)
)
Classic Interface
Users of the Classic interface gain access to the Control Panel by clicking the Start button, moving the mouse up, and clicking once on the Control Panel icon ( Figure 3.26 ).
)
Figure 3.26 Accessing the Control Panel in the Classic interface.
After that, each operation is identical to the descriptions given in this chapter.
To resize in the Project Browser or on the Timeline:
- If you have already imported your images and you now want to resize them, right-click the image in the Project Browser (or on the Timeline) and select Properties from the menu ( Figure 3.27 ) to display the Properties of that image.
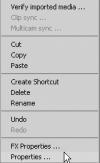
Figure 3.27 Accessing the media clip's properties.
- Select the V tab to display the visual settings and select Fit largest - Keep Aspect from the Scaling Menu Bar ( Figure 3.28 ).
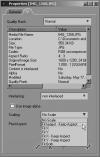
Figure 3.28 Selecting Fit largest - Keep Aspect from the Menu Bar.
- Click the plus button to apply this, and then click the check mark button to exit the Properties box ( Figure 3.29 ).
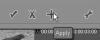
Figure 3.29 Click on the Apply button to apply the change.
)
)
)
Files that won't import or display correctly
Import problems
If you do come across a media clip that is not one of the recognized file types, or you have one that does show up in the Liquid file browser but will not import, then you will have to convert it before you try to import it.
Usually Liquid gives an error message telling you why it can't import the file, and you can use this information to help you find a conversion program. The popular program TMPGEnc (www.tmpg-inc.com) is good place to start, but other conversion programs are only an Internet search away.
Playback problems
Video files, particularly those downloaded from the Internet, are encoded with a variety of different codecs to help reduce their overall size. You may end up importing a media clip and then only seeing a blank screen when you try to play it back. If your system is working correctly, there are only two reasons for this:
- The clip needs to render before it can play back. Check this by clicking the Render icon
 to see if the clip is rendering and how long it will take.
 - The clip uses a codec that is not installed on your computer. Check this by trying to play the clip in Windows Media Player. Media Player will give an error message if it doesn't recognize the codec. If you are very lucky, Media Player will download the correct codec automatically. But only if you are lucky—in the real world this rarely works.
- Google is the place to search for the codec you are looking for, but be aware of what you are downloading! Viruses and Adware programs proliferate the codec market.
)
Which One Is Best for You?
This will depend on the original physical dimensions of the image, but because NLE is nondestructive, you can freely experiment to find out which setting works best for each image.
Figure 3.30 shows the six different options you have for stretching a photograph with the original image at top center.
)
Figure 3.30 The six different options for adjusting an image after it has been imported.
- Fit largest - Keep Aspect: Stretches each side equally
- Fit X: Stretches only the vertical and ignores the horizontal aspect ratio
- Fit Y: Stretches only the horizontal aspect and ignores the vertical aspect ratio
- Fit X - Keep Aspect: Stretches the vertical to fill the screen but keeps the horizontal aspect ratio correct
- Fit Y - Keep Aspect: Stretches the horizontal to fill the screen but keeps the vertical aspect ratio correct
- Fit Both: Stretches all sides, ignoring both aspect ratios


No comments:
Post a Comment