Sony XDCAM | Sony XDCAM HD | Panasonic P2 | | Canon | Sony HDV
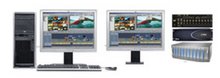
The following document is a workflow guide to using several popular cameras and decks with
Avid Liquid editors. Organized by manufacturer, a step by step common example for each of
these representative cameras or decks will be shown.. Although there can be many ways to work
with the myriad of devices available, this document focuses on the most popular recommended
practices for Liquid editing systems.
Sony XDCAM
Sony’s XDCAM decks and
camcorders use an optical
disc with a capacity of up to
23.3 GB to store recorded
media. XDCAM SD devices
can record media in highresolution
MPEG IMX and
DVCAM formats. At the same
time, XDCAM devices create
corresponding low-resolution
proxy media (MPEG-4). This allows you to work quickly with the proxy media in an off-line editing
session and then later conform the proxy media to the corresponding high-resolution media. All
Avid Liquid systems support all XDCAM SD and HD resolutions as well as proxy workflows.
Liquid Supports connections can be made via either i.link 1394 or Ethernet, examples of each
follow.
Example workflow 1394 Connection:
Sony PDW-1500 XDCAM deck with Avid Liquid
Using File Access mode (FAM):
To access XDCAM by file access mode over IEEE-1394, use Liquid’s XReceive module.
• The FAM mode is an iLink based connection which allows the drive to be mapped to
Windows. (This requires firmware version 1.1 or greater for your XDCAM device).
• The “BrowseLink mode” allows the browsing of files directly on the XDCAM disk without
copying the files to the hard disk. This mode is used for defining clips using Mark In/Out.
This mode allows only video scrubbing, no audio.
o By selecting “Copy Mark In/Out” only the marked section is transferred.
• “Import SMIL” edit list. By selecting “Edit” XML the SMIL is imported from the XDCAM
and a sequence is created within Liquid.
The following example workflow for an i.Link 1394 FAM (file access mode) connection can be
used for all Sony XDCAM cameras and decks:
• Open XReceive in Start/tools menu (you can map this as a keyboard shortcut)
o Check available XReceive options and select XDCAM (File access) in the list box
• Set the “media file action” drop down to *copy* to copy the XDCAM files to your hard
disk.
• A dialog opens up that let’s you browse and select a Clip’s XML files for transfer and
import into Liquid. You will see the metadata contained in the XML in the header of the
dialog.
• Click “OK” and the files are transferred to Liquid.
You may also import SMIL edls created with XDCAM. Just import the appropriate XML file,
this will import the clips and create a sequence in Liquid.
Example workflow Proxy Editing and Conform:
XDCAM provides a proxy version of the captured media for quick access to low res media that
you can easily conform to the full res originals. Below is a sample proxy workflow:
• Open XReceive in Start/tools menu (you can map this as a keyboard shortcut)
• Select “XReceive XDCAM proxy” and select clips on the XDCAM media in the file
browser
o This imports proxies to a Liquid rack. This is the standard process with all
XDCAM imports.
• Create a new sequence and click the Advanced button
o Set “Min. Media Quality” to “medium low”
• Edit your sequence.
• When you have finished the edit, right-click on your current sequence in its rack
o Select “condense”
o Check “create master clips in new rack”
• In the newly created rack, select all clips and select XReceive XDCAM/copy mark in/out
Once the media is copied, refresh the timeline and you will have the high res media on the
timeline.
Example workflow XSend to XDCAM
With “XSend to XDCAM” Liquid sequnces (not files) can be recorded back to XDCAM.
XSend in IMX format is not supported in Avid Liquid v7.1.
• Select the sequence object in the rack, right-click and select XSend to XDCAM.
• In the XSend dialog check “from Mark In to Mark Out only” if desired, and confirm with
“OK”
• In the browse dialog, select the XDCAM drive and the appropriate folder.
Please consider:
XSend to XDCAM DVCAM only supports streams consisting of 1 video and 4 audiostreams.
You can set the audio-streams for Fuse/XSend on the audio-mapping tab in the Audio-editor
Please make sure that the resulting (fused) clip contains exactly 1 video stream and 4 audio
streams. More than 4 or less than 4 audio-streams are not accepted by XDCAM.
Liquid XDCAM Notes:
• Supported codecs are DVCAM and IMX (disk must be formatted for DVCAM or IMX),
both in PAL and NTSC as MXF.
• When XDCAM copies the files to the hard disk, the MXF files are copied natively while
the audio is copied from MXF to WAV.
Sony XDCAM – HD
Sony’s new XDCAM HD format uses the MPEG HD codec for video recording and uncompressed
audio. Frame rates supported are 59.94i and 50i. The recording bit rate is 35, 25(HDV), and
18Mb/s. Avid Liquid supports XDCAM HD for all XDCAM resolutions.
The workflow for Sony XDCAM HD devices is identical to the XDCAM SD workflow. However
there is no write back (XSend) support.
Panasonic P2
Panasonic’s P2 decks and camcorders record DVCPRO at 25 and
50 Mb/s (sometimes referred to as DV25 and DV50) to solid-state
memory cards. Panasonic has recently added support for DVCPRO
HD at 100Mb/s (DV100). The Avid Liquid family supports DV25 and
DV50 as MXF files, DVC100 is planned for a future release.
Avid Liquid editing applications support editing of media directly from P2 media without the
need to capture or import for the fastest possible workflow.
Since P2 card media is expensive, many users also like to transfer P2 media to local or shared
storage. Panasonic has created an external 60 GB hard drive for this purpose called “P2 Store”.
P2 (such as the AG-HVX200) typically connect to Avid systems through a computer’s USB port
although the SD DV formats can be recorded to tape and accessed via firewire (1394).
Example workflow:
Panasonic P2 Media with Avid Liquid software
P2 cards can be mounted as drives under Windows using a PCMCIA slot (specific driver required)
or by using a Panasonic P2 device connected by USB.
• Open XReceive in Start/tools menu (you can map this as a
keyboard shortcut),
• Select XReceive from Panasonic P2 from the drop down list.
You have two options:
o Select “link” and confirm with “Browse Link” for
accessing the clip(s) directly off the P2 media.
o Select “copy” for copying the P2 clip(s) to your hard
drive.
A dialog appears presenting three options:
• Automatically import all clips from the P2 drive. This will add all clips from P2 as invidual
clips and as a sequence clip to the Liquid project.
• Automatically import all spanned files on the P2 drive. This will add all clips from P2 as
single clips and as a sequence clip to the Liquid project.
• Open the filebrowser for selecting the files manually either as XML files (select XML in the
filetype drop down list), or by thumbnails (select “bmp” in the filetype drop down list).
o Select appropriate files for import.
Clips will be added to the selected rack (if the option was activated) or a new rack named
“XReceive” will be created in Liquid projects which contains the clip(s)
JVC
JVC features a “Pro HD” line of HDV devices that include the
GY-HD100U and BR-HD50 Deck. The line supports SD via DV
format recording and HD via HDV format recording. The
Avid Liquid family supports all of the SD formats as well as
the HD formats, except for the 720p/23.976.
Example workflow:
JVC GY-HD100U and DR-HD100U with Avid Liquid Pro
In this example you are capturing 720P 29.97 from the GY-HD100U. Final deliverable is an
HDV tape and an SD DVD.
1. Create a New Sequence using the “HDV 720/29.97” preset.
2. Connect the camera to the PC via FireWire (1394).
3. Capture the HDV footage using the Logging Tool.
4. Edit the Media.
5. Output the final sequence to HDV tape:
a. Simply Record to Tape.
6. Conform the HDV Sequence to SD
a. Create an NTSC 16x9 Sequence
b. Select all of the clips in your HDV sequence and paste them into an SD
Sequence.
c. Right-click on a selected clip. Select Properties. Select the “V” Tab.
i. From the V Tab, click on the scaling drop down list and select “Fit XKeep
Aspect”. Now all of your clips are scaled for the SD sequence.
d. Author the DVD as needed or simply burn your existing project directly to DVD.
Canon
Canon’s new XL H1 HDV camera supports SD via DV format recording and HD via HDV format
recording. Avid Liquid and Liquid Chrome HD systems support all SD DV formats. For HD, the
following formats are supported:
Canon
Format
Resolutions Actual
Format/Rate
Liquid
Sequence
Type
1080i 60 HDV 1080i 59.94 1080i 59.94
1080i 50 HDV 1080i 50 1080i 50
The following caveats apply when using this camera:
• The 24F, 25F and 30F frame rates are not presently
supported.
• The XL H1 has a mode that allows for the recording of 4 channels of audio with HDV.
This mode is not supported. When we capture tapes recorded in this mode, only
channels 1 and 2 are captured.
Example Workflow:
Canon XL H1 with Avid Liquid Chrome HD
In this example, footage is captured at 1080i 59.94. 4:3 SD archive footage is also used in the
project. Final Output is out to HDCAM.
1. Create an Avid Liquid Sequence using the HDV 1080i 59.94 preset on the Liquid Chrome
HD system.
e. Connect the XL H1 camera to the Liquid Chrome system with FW (1394)
2. For HDV capture, go to Logging Tool and capture your footage.
3. For SD capture, create a new Sequence using the NTSC 4x3.
a. Capture SD material from the XL H1 in DV mode, or from another deck.
i. Capture into a rack titled 4x3 media.
4. Edit the Media
a. Mix the HDV media with NTSC media on the Avid timeline in realtime.
a. To scale your 4x3 Media to fit the timeline, select all of the 4x3 clips,
right click on one of the selected clips and select properties.
b. Go to the “V” Tab, click on the scaling drop down list and select “Fit Y -
Keep Aspect”. Now all of your clips are scaled for the HD sequence.
The Liquid Chrome HD hardware handles the scaling of the HDV sequence to 1920x1080.
Output the final HD sequence to HDCAM via HD-SDI:
a. File/Record to Tape
SONY
The SONY HVR-Z1 camcorder supports SD via DV format
recording and HD via HDV format recording. Avid Liquid and
Liquid Chrome HD support capture and record-to-tape in both
1080i/50 and 1080i/60.
Example Workflow:
SONY HVR Z1 with Avid Liquid
In this example, footage is captured at 1080i 59.94 and then output to Windows Media HD.
1. Create a new Sequence using the HDV 1080/59.94i preset.
2. Capture footage from the camcorder using the Logging Tool
3. Edit the media
4. Once you have finished, go to the Output Quick Menu in the Liquid toolbar and select
Output/Windows Media.
a. From the Windows Media Export dialog box, select the appropriate preset from
the “HD Profiles” folder.
Tuesday, June 12, 2007
Subscribe to:
Comments (Atom)