I'll strongly recommend it to anyone who wants to know more about Avid Liquid. It's pretty straight forward, no nonsense & a detail step by step guide to doing things in Liquid.
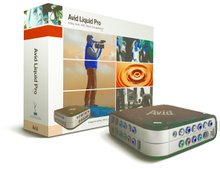
Article Description
Importing media directly into your computer is the most direct way you have of bringing media clips such as pictures, music, animations, and other media types into your project. This chapter will help you learn to import media into your Liquid project.
The alternative to using the Logging Tool is to directly import media into your computer. It is the most direct way you have of bringing media clips such as pictures, music, animations, and other media types into your project.
Liquid 7 can work with an extensive list of file formats, with most common types of media supported. However, the types of imports you are most likely to make will fall under one of these categories:
- Windows Video standard (AVI) files; this includes DivX and WMP9 movies—which in version 7 now import without having to break apart the embedded data in some encoded video files (known as demuxing), and play without requiring rendering.
- Video object (VOB) files from a DVD; these also no longer need demuxing on import in version 7.
- DV as AVI files, and HDV as M2V files.
- Music formats such as WAV, MP3 files, and CD tracks ripped using Windows Media Player.
- Picture formats including JPEG, TIFF, BMP, and others.
- Apple's Movie standard (MOV files) and MPEG files such as the VCD and SVCD MPEG formats.
Any number of clips can be imported at any one time, and there is no physical size restriction either, although extra-large files will make your Timeline very slow to update.
Touring the Import Media Window
Importing a media file is essentially the same process no matter what type it is—the exceptions being S/VCD and VOB files, which have an extra preview feature. For all other media files, Liquid uses the same interface—the Import Media window—to suck them into your projects.
To Open the Import Media window:
- Do one of the following:
- From the menu bar, select File > Import > Media ( Figure 3.1 ).
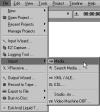
Figure 3.1 Opening the Import Media window using the Menu Bar interface.
- Right-click on the menu bar's Rack Window button
 at the top right of the Project Browser. This Import Media window is fairly uncomplicated with only limited options to choose from ( Figure 3.2 ).
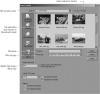
Figure 3.2 The Import Media window viewed here as thumbnails.
- From the menu bar, select File > Import > Media ( Figure 3.1 ).
- To exit the Import Media window without importing anything, click Cancel.
)
)
)
Elements of the Import Media window
The following list describes the various feature of the Import Media window.
- File location selection area: All Windows commands are supported here including Create New Folder and browsing directories. The last icon on the list can select Thumbnails, Titles, Icons, Details, or List View just as you would do when using Windows Explorer.
- File selection area: As a rule, if it appears in this window, then you can probably import it into the Project Browser.
- Filename: Once the file is selected, the filename appears here.
- Files of type: If you want to filter the files, you can subdivide the media clips into their different categories ( Figure 3.3 ).
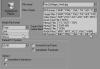
Figure 3.3 The three choices available from the Media File Action menu appears on the left of the Import Media window. The Files of type filter is in the middle of the window.
- Media File Action: Here you decide what method of import to use for each media clip. There are three choices (see Figure 3.3 ).
- Link: This creates a simple link between the original media clip and Liquid; a new file is not created. This type of import is quick because no new media is created. If a media clip is in a place where it is unlikely to be moved (for example, on your local media drive), then you could safely use Link and enjoy the speed benefits this offers.
- Copy: This copies the original media clip to whichever location you have specified. This is the best option to use if you are importing MP3 or WAV files from a CD, or video files from SVCD or DVD sources.
- Move: This physically moves the original media clip to the media drive.
)
Both Copy and Move require some kind of file transfer, which will create a slower import than the Link method. If, however, the media clip exists on a network or removable drive, then you will want to copy or move it so that you can guarantee access to it in the future.
Copy is the safest option since Move will physically remove the media clip from wherever it was originally stored.
- Default TC system: This is only used when importing a video clip and with a frame rate that is not standardized. See Chapter 6 of the Avid Liquid Reference Manual for complete details.
- Options: Here you have two check boxes:
- Autodetect animation: This is used to import animation files so that only one file, a reference file, appears in the Project Browser. See the "Importing Animated Sequences" sidebar for details.
- Trust Media Metadata: This is used by another version of Liquid called Liquid Chrome.


1 comment:
Great blog congratulations!come visit our site and see amazing free on line movies www.zigbr.com
my site is the best in the world
Visit the best free vids site on the net
Post a Comment