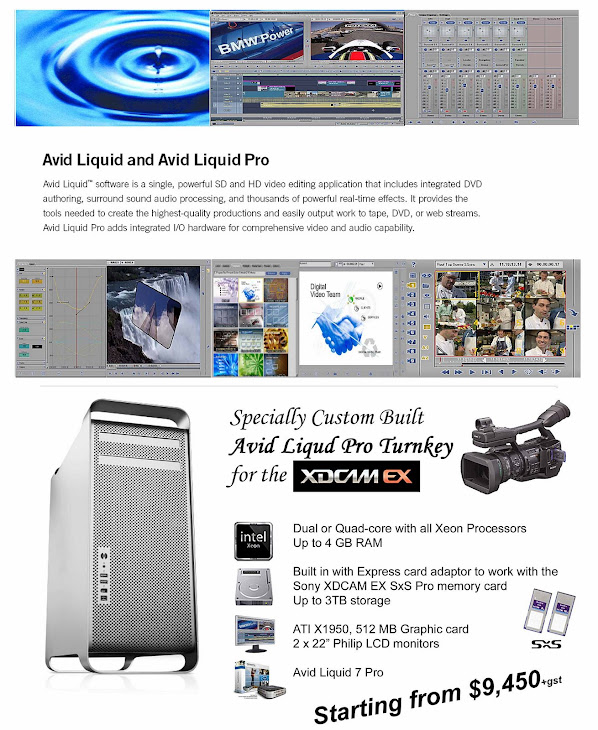
I just come back from a 5 weeks holiday but I have not neglected the blog. So here is the latest update from Avid on version 7.2
Version 7.2 Fixes
Audio:
Ø Resolved an issue with SmartSound clips repeating samples on each clip edit
Ø Audio time warps now play back in sync when there is another audio track below
Ø Adjusting the pan and volume via mouse control now functions properly
Capture/Print to Tape:
Ø Vertical Lines no longer occurred in captured SD SDI footage in Avid Liquid Chrome HD
Ø HDV scene detection during capture is now functioning correctly
Ø In the following 720 60P format, stripe tape no longer fails with the error message “Command can not be executed at specified position on tape" This has been resolved
Ø Panasonic P2 files can now be recorded to tape successfully
Ø With the ProBOB, capturing DVCPRO25.AVI with i.Link no longer has reversed fields at output. This has been resolved
DVD:
Ø Resolved an issue where compiling a DVD would hang at the “Compiling VOB Files” status (around 60% complete)
Ø DVD Export: Resolved an issue with default settings for media size. You can now modify the image size on machines without a DVD burner
Ø DVD Export: You can now allow 18/15 maximum GOP sizes for NTSC/PAL to avoid re-encoding of 18/15 GOPs
Ø Resolved an issue with the navigation in the DVD menu, where it jumped to the wrong chapter in the VOB files. This is now resolved
Ø DVD burners are now recognized on a clean Windows XP operating system install on an HP XW8200 workstation
Effects:
Ø Applying the following combination of time warp + sequence container + cross fade would result in a black inlay. This is now resolved
Ø Opening the BAS-Clapper transition in Hollywood FX no longer causes an abnormal exit to the desktop. This has been resolved
Import/Export:
Ø SmartSound clips now export in MPEG-2 with audio
Ø Exported MPEG-2 clips that are then imported no longer display the “file or compression is not supported “error
Ø Previously, when exporting Avid Liquid codecs in Adobe After Effects 7, a slight pixel shift occurred. This has been resolved
Ø When in Adobe After Effects 7, the Avid 2VUY HD QT codec now exports at the correct frame rate
Ø Previously, DVD Export would fail with an "Export Failure (render error)" when audio settings were set to Dolby Digital and Matrix Surround. This has been resolved.
Ø DivX import and export’s aspect ratio is now correct for 16x9
Ø The ALE link path is now remembered correctly after another import when using FireStore drives
Ø Addressed an issue with silent audio in the clip/source viewer with MPEG1 imported clips in Liquid Chrome Xe
Ø Resolved an issue where XReceive of XDCam clips were not importing consistently
Ø Re-encodes are no longer needed when you export IBP extended resolution media. This is resolved
Ø Resolved an issue where certain AVI files (type 1, for example) could not be imported correctly
Ø Exports to PlayStation portable devices now correctly export as 16x9 instead of 4x3.
Ø XDCAM DVCAM proxy clips are no longer overwritten by additional XReceive/imports.
Ø Resolved an issue with copied clips being unable to verify via the “verify imported media” feature. This now works correctly
Ø IBP-Codecs now support SD Extended Resolutions
Ø Resolved verify media issues – including an issue with the dialog window as well as the verify media/copy option
Ø XReceive of Panasonic P2 clips now supports reel names that use 20 digits of creation/update time in XML. Previously this was 10 digits
Ø Resolved an issue with the MPEG output settings for HD/HDV 1080
Ø Imported animations that were copied into projects now have the correct file path in the project backup
Ø XReceive XDCAM Studio files no longer abnormally exit to the desktop.
Ø Liquid Chrome XSend to Avid Media Stream Server no longer produces eight .wav files
Ø Clip Xsend no longer creates black clips. This has been resolved
Ø Importing BSI files no longer causes an abnormal exit to the desktop. This has been resolved
Ø XSend to Avid Media Stream Server now correctly includes the audio files
Ø An XReceive on more than 12 clips no longer causes a system crash
Ø XSend to Adobe After Effects 7.0 is now functioning correctly
Installation:
Ø Reinstalling Liquid no longer removes HollyWood FX from Liquid
Ø The Spanish version of Liquid installations no longer enumerate all effects on the first start
Ø Installation on a clean system no longer adds a wrong path to the render/capture directory
Ø Resolved an issue with installing Hollywood FX; no longer requires a C:/ directory path
Playback/Timeline/Trim/Scrub/Editing Functions:
Ø Resolved an issue with new slices for trimmed video clip
Ø Avid Liquid 7.2 can now import projects from the latest version of Studio
Ø Audio scrub in trim editor now works correctly with ProBOB output
Ø Audio key frames can now be set properly at the start/end of clips using the “add key frame” button
Ø Resolved a performance issue in HDV when fusing green slices
Ø Resolved the following error “Bad Slice Count”; when building sequences
Ø Resolved the following issue - with a ProBOB connected, the video output monitor was 8 frames behind the inlay after shuttling had stopped in the timeline
Ø HD1080/60i MPEG-2 is no longer field reversed in a NTSC SD timeline. This has been resolved
Ø Setting Mark In during play no longer causes Liquid to lock up. This has been resolved
Render/Consolidate:
Ø Resolved issue with the SmartSound render folder changing to the c:/ directory
Ø Resolved a problem where Liquid would become sluggish while rendering in HDV
Ø A color shift no longer occurs in the rendered result of 1080/59.94 HD media with over-layed titles
Ø Selecting Consolidate Sequence via the right click menu now works correctly
Ø Applying a RT FX 3D CPU effects will no longer render pixilated. This has been resolved
Ø Applying a DMC filter now renders correctly when there is more than one keyframe applied
Ø Improved the process for converting projects from Liquid v7.1 to Liquid v7.2
Ø SmartSound clips, when placed underneath a track with an IPB clip, now renders and plays back correctly
Ø HD render times are now improved with sequences that contain multiple color correction clips
Ø A fuse of a 16:9 sequence now correctly shows clip properties as 16:9 rather than 4:3
Ø With “export separate audio streams” selected in the export settings, fused sequences no longer generate eight .wav files. This has been resolved
Ø Inlay (playback) no longer freezes after 1-2 seconds when used with unique render/fuse codecs
Settings:
Ø Selecting manage project->save a copy now correctly prompts for duplicate folder names
Ø Changes to motion detection settings no longer creates unwanted edit changes.
Ø Removed second head restrictions for older catalyst ATI drivers
UI:
Ø Resolved an issue in the Spanish version of Liquid; where a Mixer tab was missing from the keyboard settings


)
)
)
)
)
)
)
)
)
)
)
)
)
)
)
)